




If your car’s A/C is not blowing cold, the culprit is almost always one of three things: a refrigerant leak, restricted airflow from a clogged cabin filter or dirty condenser, or a compressor and electrical fault. Set your controls to max cool and run the quick checks below first. If the air still isn’t cold, book a technician for leak detection and pressure testing rather than just adding refrigerant.
TL;DR:
- Low refrigerant from leaks is the most common cause of poor cooling, often accompanied by oily residue around fittings or hissing sounds.
- A clogged cabin air filter or dirty condenser can restrict airflow, resulting in vents that blow cool but not cold air.
- Electrical faults, including blown fuses or failed relays, can prevent the compressor from engaging, leading to warm or inconsistent air.
- Simple curbside checks to observe compressor clutch behavior and inspect for leaks or debris can help identify the issue before requiring professional diagnosis.
- Proper shop diagnostics involve pressure tests, leak detection, and electrical checks to accurately locate faults, with leak repair and system recharging being standard solutions.
Table of Contents
- Is It No Airflow, Warm Air, or Just Not Cold Enough?
- What’s Actually Causing Your Car AC to Blow Warm
- Curbside Checks Before You Head to the Shop
- How a Technician Diagnoses a Warm AC System
- What Repairs Cost and How to Prevent a Repeat
- What We Tell Customers Before Any AC Repair
- Get Your AC Diagnosed Right the First Time
- Sources
Is It No Airflow, Warm Air, or Just Not Cold Enough?
Before you chase a diagnosis, figure out exactly what you’re feeling at the vents. This one step separates a $30 filter swap from a $1,200 compressor job.
- No airflow at all: air barely moves even on the highest fan setting. This usually points to the blower motor, a blown fuse, or a duct blockage, not the refrigerant system.
- Warm or hot air only: the compressor likely isn’t engaging, or you’re dealing with a serious refrigerant loss.
- Cool but not cold: air moves fine and feels slightly cool, but never gets icy. This is the classic sign of low refrigerant, a clogged cabin filter reducing airflow across the evaporator, or a partially blocked condenser.
- Some vents cold, others not: often a blend door actuator or a duct routing issue rather than a refrigerant problem.
Try switching fan speeds and vent positions while you check. If the blower responds normally but temperature never drops, the fault sits in the cooling circuit. If fan speed changes do nothing, look at electrical and blower components first.
What’s Actually Causing Your Car AC to Blow Warm
Most cool-but-not-cold complaints trace back to a handful of repeat offenders, and each one leaves its own set of clues.
Low refrigerant from a leak is the single most common reason a system stops cooling well. Refrigerant doesn’t get “used up” the way gasoline does. If your level is low, it’s leaking somewhere, and low refrigerant is one of the most common reasons an A/C system stops cooling effectively. Watch for intermittent cooling that fades over days or weeks, a faint hissing sound near hoses, or oily residue around fittings, since refrigerant oil escapes with the leak.
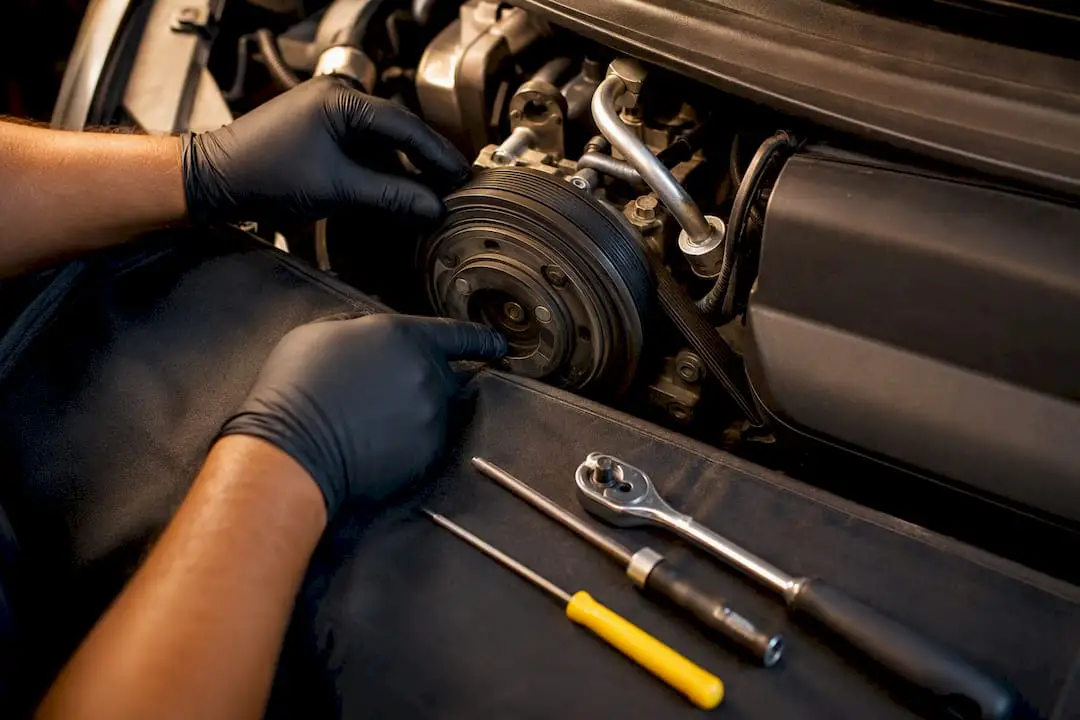
Compressor and clutch problems show up as loud grinding noises or a compressor clutch that never engages when you switch the A/C on. This is one of the pricier repairs on the list, so confirming it before authorizing work matters.
A clogged cabin air filter or dirty condenser restricts airflow, and a dirty cabin air filter reduces airflow across the evaporator, which is exactly what makes vents blow cool instead of cold. Both are inexpensive, straightforward fixes compared to internal component failures.
Blend door actuators can stick or fail electrically, mixing in warm air even when the refrigerant circuit is healthy. This mimics a cooling failure but has nothing to do with refrigerant charge.
Electrical faults, including blown fuses, bad relays, or a failed pressure sensor, can prevent the compressor from ever engaging.
Quick reference: Consumer guidance from KBB lists refrigerant loss, dirty condensers, compressor failure, electrical faults, and clogged cabin filters as the most frequent causes behind an A/C blowing warm.
Curbside Checks Before You Head to the Shop
You can gather useful information in about ten minutes without any tools beyond your own hands and eyes. This narrows down the problem and gives your technician a head start.
- Set the controls to MAX cool and the highest fan speed. Feel the center vents and note how cold the air actually is, not just “cooler than outside.”
- Watch the compressor clutch with the hood open, engine running, and A/C on. Listen and look for the clutch engaging steadily. Rapid on-off cycling or no engagement at all is meaningful information.
- Check the cabin air filter and condenser fins at the front grille for dirt, leaves, or bugs blocking airflow. A heavily clogged filter is one of the easiest problems to catch yourself.
- Look for oily residue around hose fittings, the compressor, and the condenser. Oil stains mean a leak.
Do not attempt to add refrigerant or connect a pressure gauge yourself without confirming a leak first. Overcharging or introducing contamination makes the eventual repair harder and pricier.
Pro Tip: Write down exactly what you observed, including fan speed, clutch behavior, and vent temperature, before you call the shop. Technicians can diagnose faster when they aren’t starting from zero.
Stop and call a professional immediately if you see a visible leak, smell anything burning, notice the windshield fogging, or find the compressor isn’t engaging despite the system having power.
How a Technician Diagnoses a Warm AC System
A proper shop diagnosis goes well beyond feeling the vents. Technicians rely on measurable data because the refrigerant circuit moves through the compressor, condenser, expansion device, and evaporator in sequence, and pressure and temperature at each stage reveal exactly where the fault sits.
| Test performed | What it reveals |
|---|---|
| Manifold gauge pressure (low and high side) | Distinguishes low refrigerant charge from a restriction or blockage |
| Vent temperature under controlled conditions | Confirms actual cooling capacity without sun or airflow skewing results |
| Electronic leak sniffer or UV dye | Pinpoints the exact leak location |
| Electrical checks (fuses, relays, clutch voltage) | Confirms the compressor is getting power to engage |
| Control module scan | Flags actuator or sensor faults triggering symptoms |
Vent temperature checks are done under stable conditions, no direct sun on the vehicle, doors closed, engine at a steady idle, because ambient heat can throw off readings by several degrees. Leak detection typically comes before any recharge, and refrigerant is properly reclaimed from the old system rather than vented. Skipping the leak check and simply topping off refrigerant is a temporary patch. The gas will leak out again, and repeated recharges without repair waste money and refrigerant that should be recovered and reused responsibly.
What Repairs Cost and How to Prevent a Repeat
Repair costs vary by vehicle and by what’s actually broken, so always get a written estimate before authorizing work. As a general guide, a cabin filter swap or condenser cleaning is usually inexpensive. Leak repair combined with a recharge can cost a moderate amount depending on parts involved, while a compressor replacement runs considerably higher since it involves a major component and often related parts.
Common services include the diagnostic itself, leak repair at hoses or O-rings, component replacement (compressor, condenser, or evaporator), and a full system flush and recharge once repairs are complete.
On urgency: minor airflow issues like a dirty filter are safe to drive with for now. Avoid long trips if you suspect compressor or condenser damage, and treat burning smells or a fogging windshield as reasons to stop driving and get it checked right away.
To avoid a repeat trip:
- Replace the cabin air filter on your vehicle’s recommended schedule.
- Clear leaves and debris from the front grille and condenser regularly.
- Run the A/C for a few minutes even in cooler months to keep seals lubricated.
- Schedule a seasonal A/C check before summer heat arrives.
What We Tell Customers Before Any AC Repair
Tell your technician exactly when the problem started and any recent work done on the vehicle. Ask for recorded vent temperatures and gauge readings on the repair order, not just a verbal “it’s low.” Confirm leak detection was performed and that old refrigerant was properly recovered before any new service.
Be cautious of a flat-fee quote with no listed tests behind it. Ask about the parts warranty and whether the shop can point to the actual leak site on your vehicle.
— Kwik Kar
Get Your AC Diagnosed Right the First Time
A lot of shops will recharge your system and send you home without ever checking for a leak, which means you’re often back in a few weeks with the same warm air problem. Professional mechanics run A/C diagnostic checks, leak detection, and refrigerant reclaim before any recharge, plus component replacement when a compressor or condenser has genuinely failed.

Bring in whatever you noted from your own vent temperature and compressor clutch checks. This helps diagnose faster. You should leave with documentation covering what was tested, including gauge and temperature readings, not just a receipt that says “recharge.” If your car’s electrical system needs a closer look alongside the A/C, module and fuse diagnostics from a partner like Airbag Reset UK cover similar electrical testing principles worth knowing about.
Check our current specials before you book, then visit our services page to schedule an A/C inspection. If you’re noticing burning smells or a sudden compressor failure, call us directly rather than waiting for an appointment slot.
Sources
- Does a cabin air filter affect AC?
- Automotive air conditioning (UTI)
- Troubleshooting common car AC issues (Toyota)
- Car AC not blowing cold air: possible causes (KBB)