




Most headlight bulb replacements are straightforward and can be done at home in 15 to 60 minutes with basic tools. Replaceable-bulb headlamps on the vast majority of cars, trucks, and SUVs let you swap a bulb without removing the whole assembly. The exceptions are sealed or integral units, damaged sockets, and any job that leaves you unsure about beam aim, all of which call for a trained set of hands.
TL;DR:
- Most headlight bulbs are easy to replace at home but require careful handling of the bulb, socket cleaning, and verifying correct fitment.
- Using original equipment manufacturer or reputable aftermarket halogen bulbs is recommended, as LED conversion kits may violate federal standards.
- Proper aim checking after installation is crucial, especially if the assembly is removed or replaced, to ensure optimal visibility and safety.
- Access difficulty varies; some vehicles require removing covers, shifting components, or even bumper removal, and sealed units demand professional replacement.
- Regular maintenance, including proactive replacement and aim verification, helps prevent driving in low visibility conditions due to failed or misaligned headlights.
Table of Contents
- What to Buy and What Tools to Have Ready
- Step-by-Step: Removing and Installing a New Bulb
- Common Tricky Access Scenarios
- Handling Precautions and U.S. Regulatory Limits
- Checking Your Work: Function and Aim
- When a Shop Is the Better Choice
- A Mechanic’s Note on Prevention
- Let Us Handle the Lighting, Aiming, and Diagnostics
- FAQ
- Sources
What to Buy and What Tools to Have Ready
Before you touch a screwdriver, confirm the exact bulb your headlamp needs. Your owner’s manual lists the part number, and many parts stores let you search by year, make, and model. The lamp base code (like H11 or 9005) matters more than brand, since a mismatched base won’t seat or seal correctly.
Gather these items before you start:
- Nitrile or cotton gloves to keep oils off the bulb glass
- A lint-free cloth and isopropyl alcohol for cleanup
- Screwdrivers, a small ratchet set, and plastic trim tools for clips
- Dielectric grease for the socket connector
- A flashlight or phone light for tight spaces
Stick with OEM or a reputable aftermarket halogen bulb matched to your original base and wattage. Skip LED conversion kits marketed as drop-in halogen replacements. As the NHTSA interpretation on LED headlights explains, these conversions can violate federal lighting standards when installed in housings designed for halogen bulbs.
Step-by-Step: Removing and Installing a New Bulb
Start with the vehicle off, keys out, and the parking brake set. Let the old bulb cool if the headlights were just on, and wear gloves or keep a clean towel between your fingers and the glass.
Most vehicles use one of three access patterns, but the core steps are the same once you reach the bulb:
- Open the hood and locate the back of the headlight housing, or access it through the wheel well if your engine bay is tight.
- Unplug the electrical connector by squeezing the release tab and pulling straight back.
- Release the retaining clip or rotate the bulb counterclockwise if it uses a bayonet-style base.
- Pull the old bulb straight out without touching the glass envelope.
- Align the tabs on the new bulb with the socket slots and push it in until it seats.
- Lock the retaining clip back into place or twist the bulb clockwise to secure it.
- Reconnect the electrical connector until you hear or feel it click.
- Turn on the headlights before closing everything up to confirm the bulb lights on both low and high beam.
That last step matters more than it sounds. Testing before final reassembly saves you from reopening a housing you just buttoned up, and it catches a bad bulb or a connector that didn’t seat the first time.
Pro Tip: Snap a quick photo of the wiring and clips before you unplug anything. It takes ten seconds and saves real frustration if a connector isn’t obvious when it’s time to put things back together.
If the retaining ring feels stuck, work it gently rather than forcing it, since plastic tabs crack easily with age. Corroded sockets are a common culprit behind a bulb that won’t seat fully or that blows again shortly after replacement. According to AAA’s car care lighting guide, cleaning corrosion from the contacts or replacing a damaged socket often solves repeat failures that look like a bad bulb but aren’t. If a new bulb blows a fuse immediately, stop and have the wiring checked rather than swapping bulbs again.
Common Tricky Access Scenarios
Some vehicles make you work for it; if you encounter access difficulties, professional lock and ignition repairs can ensure proper handling of complicated components. A few patterns show up often enough to plan around:
- Tight engine bays sometimes require removing the battery’s negative terminal or shifting the airbox aside rather than forcing your hand into a cramped space.
- Reaching headlight bulbs through the wheel well usually means turning the steering wheel fully toward that side first, then removing a plastic splash shield held by push clips or small screws.
- Splash shield clips are easy to break; pop them straight out with a trim tool instead of prying at an angle.
- Sealed or integral headlamp assemblies have no accessible bulb socket at all. If you can’t find a connector or retaining ring from the back, the unit likely needs professional replacement.
- Some trucks, SUVs, and European sports cars pack the headlamp so close to the bumper or fender liner that partial bumper removal is the only way in.
Handling Precautions and U.S. Regulatory Limits
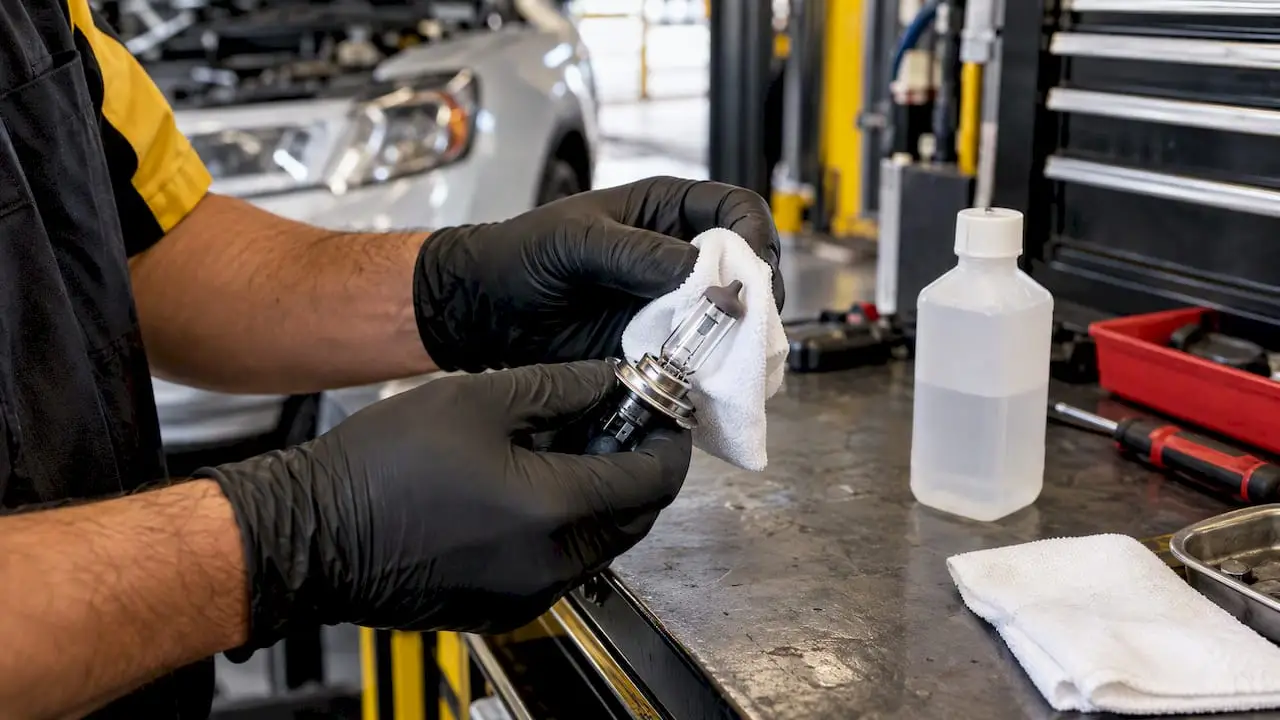
Halogen bulbs run hot and the glass is sensitive to skin oils, which create hot spots that shorten bulb life. Handle them with gloves or a clean towel, and if you do touch the glass, wipe it down with isopropyl alcohol on a lint-free cloth before installing it.
NHTSA’s interpretation letter on LED headlights notes that aftermarket LED bulbs sold to replace halogen bulbs in housings designed for halogens can fail to meet Federal Motor Vehicle Safety Standards. That’s a meaningful limit on the “just buy LEDs and upgrade” approach many DIYers consider, according to NHTSA.
It’s also worth knowing that swapping bulb technology doesn’t guarantee better visibility. Consumer Reports testing found that LED and HID low beams don’t consistently light up more road ahead than halogens, since the reflector and lens design in the headlamp assembly do most of the work. If you change bulb technology or remove the assembly for any reason, plan on a follow-up aim check.
Checking Your Work: Function and Aim
Once the new bulb is in, run through a short checklist before calling the job done:
- Turn on low beams, then high beams, and confirm both sides light evenly with no flicker.
- Check your instrument cluster for a bulb-out warning light that hasn’t cleared.
- Have someone watch from outside while you test turn signals and running lights if they share the housing.
- Park about 10 to 25 feet from a flat wall or garage door on level ground and compare where each beam’s cutoff line lands side to side.
If one beam sits noticeably higher, lower, or more scattered than the other, that’s a sign the housing shifted during the job or the aim was already off. A quick trip to a shop with proper aiming equipment settles it faster than guesswork in your driveway.
When a Shop Is the Better Choice
Some situations go past a reasonable DIY job, even for a confident home mechanic. Watch for these red flags:
- Melted or deformed sockets, which usually point to a wiring or fuse problem rather than a bad bulb
- Visible burned or discolored wiring near the connector
- A sealed, integral headlamp assembly with no accessible bulb socket
- A beam that still looks misaligned after reinstalling the assembly
- A bulb that keeps failing shortly after replacement
A single-bulb swap at a shop typically takes the same 15 to 60 minutes it would at home, with added time if the assembly needs to come out or an aim check is included. Ask for a written quote before work begins, and confirm the part number, whether an aim check is included, and that the bulb type matches your vehicle’s original specification.
A Mechanic’s Note on Prevention
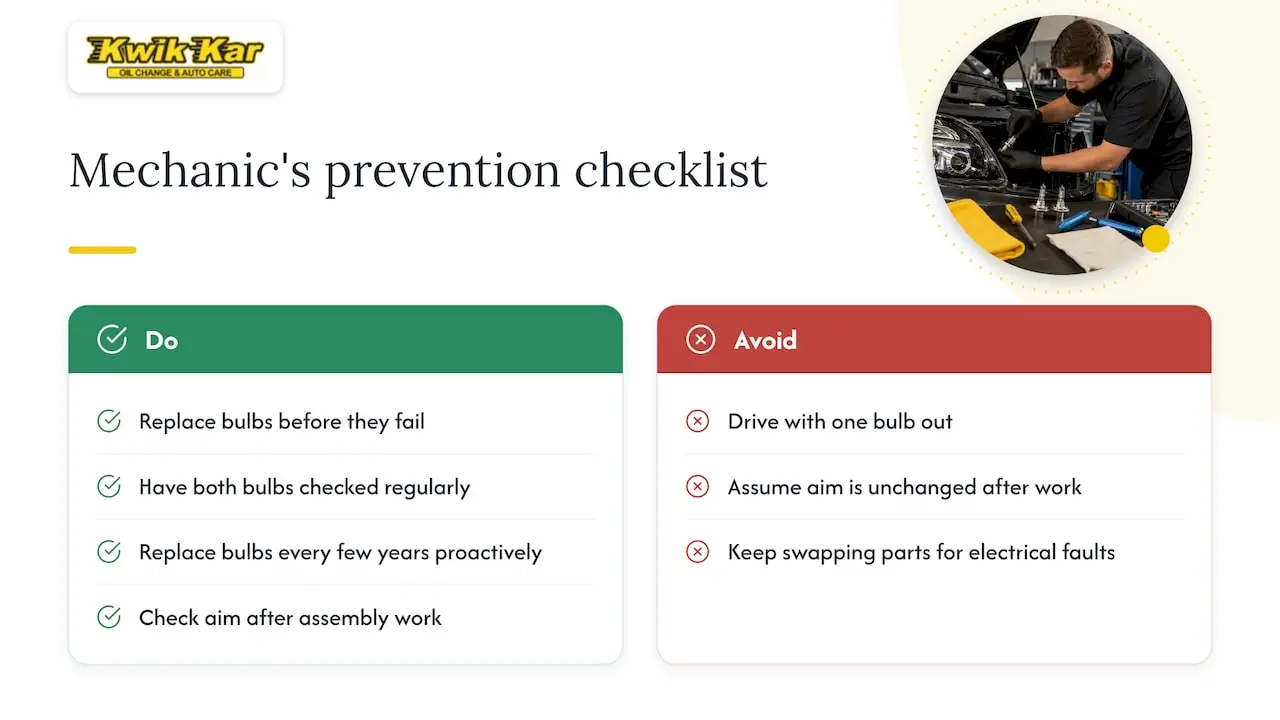
We’d rather see you replace a headlight bulb before it fails than after you’re driving home in the dark with one eye blind. Having both bulbs checked at regular service intervals, and replaced proactively once they’re a few years old, catches dim or inconsistent output before it becomes a no-light situation. The Car Care Council points out that drivers often don’t notice a single burned-out bulb from the driver’s seat, which is exactly why a second set of eyes during routine maintenance catches it first.
Any time a headlight assembly has been removed or replaced, we recommend having the aim checked rather than assuming it landed back in the same spot. And if a bulb keeps failing or something electrical feels off, that’s a job for a certified mechanic with diagnostic equipment, not another trip to the parts store.
— Kwik Kar
Let Us Handle the Lighting, Aiming, and Diagnostics
If your headlight trouble turns out to be more than a bulb swap, our certified mechanics at Kwik Kar Lube & Tune of Midlothian handle lighting replacement, aim checks, and electrical diagnosis as part of our regular maintenance work.

A repair shop will confirm the correct bulb type for your vehicle, check for socket or wiring damage you might not catch at home, and verify the beam is aimed correctly before you leave. Services typically include:
- Replacing headlight bulbs and inspecting sockets for corrosion or damage
- Performing aim checks after headlight assembly work
- Diagnosing electrical faults that cause repeat bulb failures
Browse our full lighting and service offerings or book an appointment to get it sorted without the guesswork.
FAQ
Will AutoZone replace your headlight bulb for you?
Some auto parts retailers offer free or low-cost installation help for simple bulb swaps, though policies vary by location and vehicle. For anything beyond a basic rear-socket replacement, a repair shop is a more reliable option since staff can also check the socket and wiring.
Who installs headlight bulbs for free?
Installation policies differ by retailer and location, so it’s worth calling ahead to ask rather than assuming. A repair shop visit typically isn’t free but includes a check of the socket, connector, and aim as part of the service.
Can I replace my headlight bulb myself?
Yes, for most vehicles with a standard replaceable-bulb headlamp, swapping the bulb is a manageable job with basic tools and usually takes 15 to 60 minutes. Sealed or integral assemblies, damaged sockets, or persistent electrical issues are better left to a certified mechanic.
How much does it usually cost to replace a headlight bulb?
Cost depends on the bulb type, your vehicle’s access difficulty, and whether labor is involved, so it’s best to request a quote for your specific vehicle. We recommend confirming the bulb type, any aim check included, and the total price before work begins.
Sources
- NHTSA interpretation: LED headlights (M. Baker)
- Consumer Reports — LED headlights testing
- Car Care Council — As days get shorter, check vehicle lights, wipers
- AAA — Car care lighting guide